Pre-Construction
Our position as a premier provider of top-notch goods is rooted not only in the quality of the materials we use, but also in the skillful craftsmanship of our handmade products. Our team undergoes rigorous training to guarantee that every item we offer delivers years of satisfaction. Our ability to instill confidence in our customers hinges on selecting the appropriate materials and employing meticulous engineering to achieve sturdy durability. With a well-conceived pre-construction approach, our customers can enjoy lasting contentment knowing they made a sound investment.
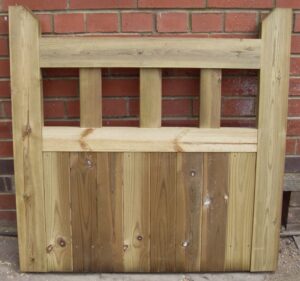
The below is a sumary of a standard gate construction. This is to help understand the process required for a standard gate.
We can tailor the build to suit your taste and requirements.
The below is a summary of a standard gate construction. This is to help understand the process required for a standard gate.
We can tailor the build to suit your taste and requirements.
First, we grab measuring tape and use it to mark 72 inches on each of the feather boards. Proceed to cut the boards. Now, we shift our focus to the 1×6 timber boards and measure three 42-inch segments on two of them. After measuring, we cut the segments to end up with three boards of 42 inches long.
We create a level surface by laying the three 1×6 boards on a flat surface such as a custom made jig. Position two of the boards parallel to each other with a 5-feet distance apart while the third board should be at the centre of the two other boards. Take the boards and gently fit each to the next neighbouring board. During this process, the 1×6 boards might get dislodged, so we take time to adjust them back to their original position while ensuring that the boards stay in place.
We proceed to fasten the boards to the horizontal brace boards using the ring shank nails. Continuously checking on the lower boards to ensure they don’t shift out of position.
After flipping over the gate, take the remaining 1×6 feather board and laying it diagonally across the horizontal braces. Then we temporarily fasten it with screws to secure it. Lay our straight edge ruler over the diagonal brace and mark six parallel pencil marks to the top and bottom of each horizontal brace. Cut at these marks using a mitre saw and remove the three cut pieces at the ends and middle. The remaining two pieces will be used as the diagonal brace.
Flip over the gate and nail the diagonal brace pieces in place with ring shank nails.
Benefits of our gates.
Our Process
Hand made craftsmanship
High quality materials
Bespoke to your individual needs
Off the peg solutions or made to individual specifications
Wide range of designs
A choice of timber to suit your requirements.


